
Alpine Linux is a lightweight, security-focused distribution that uses musl, libc, and busybox by default. It is an excellent choice for Proxmox LXC containers when you want minimal resource usage, fast boot times, and a small disk footprint. Choose Alpine for running services like Docker hosts, monitoring tools, or simple servers inside Proxmox.
Proxmox provides official Alpine Linux templates which makes installation straightforward. This guide covers both the GUI method (recommended for most users) and the command-line method using the pct tool.
Prerequisites
- A working Proxmox VE installation (version 8.x or later recommended).
- Access to the Proxmox web interface (https://your-proxmox-ip:8006) or SSH access to the host as root (or a user with
sudoaccess) - At least one storage location configured for container templates (usually
localby default).
Download the Alpine Linux template
Proxmox maintains Alpine templates in its template repository.
Via the Proxmox GUI
- Log in to the Proxmox web interface.
- Select a node in the left sidebar.
- Select local (or your template storage) > Select CT Templates > Press the Templates button.
- In the search box, type "alpine" to filter.
- Select the latest version (for example, alpine-3.22-default or newer, depending on what is available in your Proxmox version).
- Click Download. Wait for the download to finish (the file is typically under 10 MB).

Via the command line
Run these commands:
pveam update
pveam available | grep alpine
Pick the desired template name (e.g., alpine-3.22-default_YYYYMMDD_amd64.tar.xz), then download it:
pveam download local alpine-3.22-default_YYYYMMDD_amd64.tar.xzReplace the exact filename based on the output of pveam available.

Method 1: Install via the Proxmox GUI (easiest)
- In the Proxmox web interface, click Create CT (blue button at the top right).
- General tab:
- Enter a Hostname (e.g., alpine-docker).
- Set a Password for the root user (and/or add an SSH public key if preferred).
- Choose a numeric CT ID (e.g., 2001).
- Tip: For better security, use unprivileged containers whenever you can (default in recent Proxmox versions). Alpine works well unprivileged for most use cases.
Template tab:
Image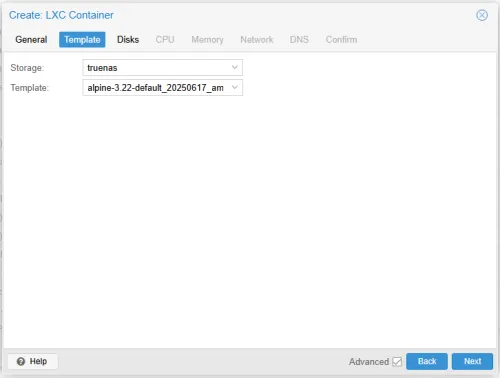
- Select Storage (usually
localby default). - Choose the Alpine template you downloaded (e.g., alpine-3.22-default...).
- Select Storage (usually
Root Disk tab:
Image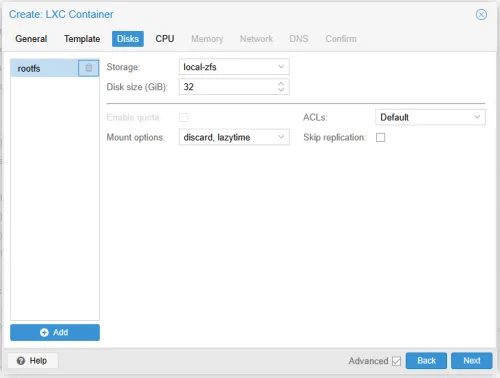
- Set disk size. Alpine is tiny so 2-4 GB is usually plenty for basic use. Use more if setting up a Docker host.
- CPU tab:
- Assign as many cores as needed. Alpine uses very few resources on its own.
Memory tab:
Image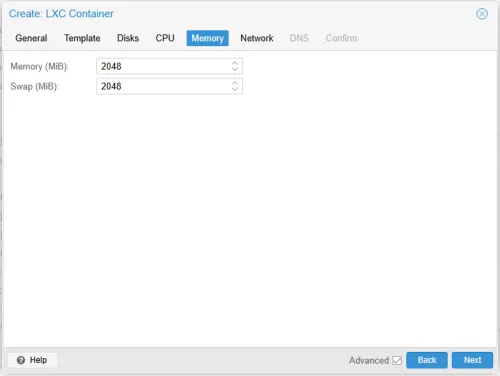
- Set configure your RAM and swap memory. Alpine runs well with low RAM, but your application may require much more.
Network tab:
Image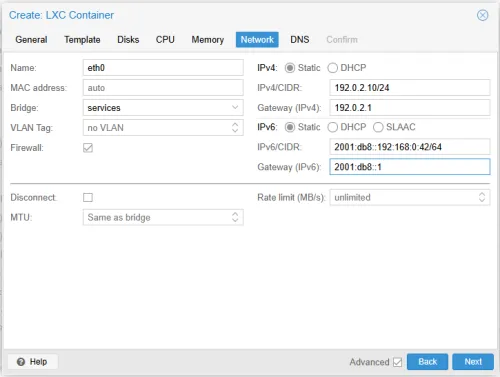
- Choose your bridge.
- Leave IPv4/IPv6 as DHCP, or configure static if preferred.
DNS tab:
Image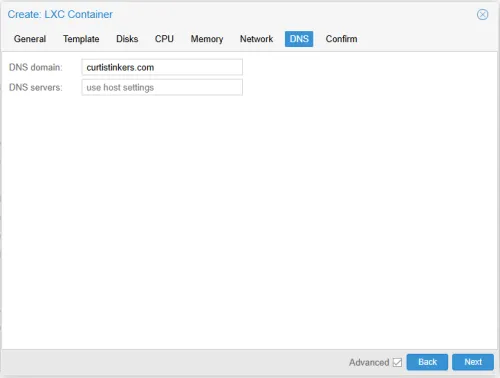
- Use host settings or specify custom DNS servers.
Confirm tab:
Image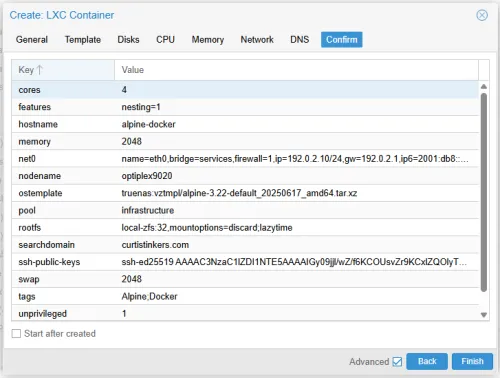
- Review options.
- Check Start after created if you want it to boot immediately.
- Click Finish.


Proxmox will create and starts the container (if you selected that option).
After creation:
- Select the new container in the left sidebar.
- Open the >_ Console tab to access it.
- Log in as root with the password you set.
Method 2: Install via command line (Using pct)
SSH into your Proxmox host as root.
- Ensure the template is downloaded (see Step 1 above).
Create the container with a basic command:
pct create 2001 truenas:vztmpl/alpine-3.22-default_YYYYMMDD_amd64.tar.xz \
  --hostname alpine-docker \
  --cores 4 \
  --memory 2048 \
  --swap 2048 \
  --storage local-zfs \
  --rootfs local-zfs:32 \
  --net0 name=eth0,bridge=vmbr0,ip=dhcp \
  --unprivileged 1 \
  --features nesting=1 \
  --password yourrootpassword
Adjust values as needed:
2001: CT ID (choose an unused number).--rootfs local-zfs:32: 32 GB disk on local-zfs storage.--unprivileged 1: Recommended for security.--features nesting=1: Useful if you plan to run Docker inside.- Omit
--passwordif using SSH keys later.
Start the container:
pct start 2001Enter the container console:
pct enter 2001
Post-installation
Run the
alpine-setupscript to configure your host:alpine-setupUpdate the system:
apk update
apk upgrade
Final thoughts
- Alpine uses OpenRC by default, so services are managed with
rc-updateandservice.rc-update add servicename bootto enable on boot.service servicename start/stop/restart.
To add the community repository for more packages (edit
/etc/apk/repositories):http://dl-cdn.alpinelinux.org/alpine/v3.21/communityThen run
apk update.
That is it. You now have a clean, efficient Alpine Linux container running in Proxmox, ready for your services.


